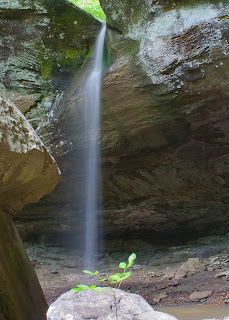
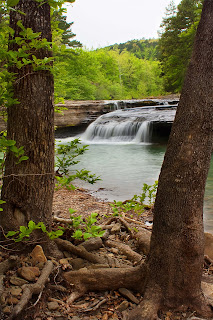
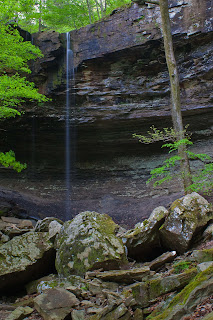
This was a Dad-Daniel hunt, our first with just the two of us. We decided to head to Pam's Grotto, which is very near where we finished hunting last week. The trailhead is about a mile from the Haw Creek campground. The parking area is right next to Haw Creek, so we ventured down there to see what we could see.
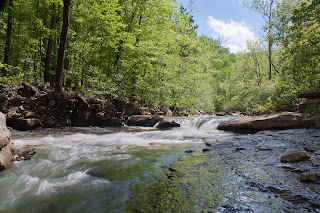
I don't know if you would call this a waterfall or a Class III rapids. (1/12 sec, f-18.2, ISO800)
Everything is centered on the middle, which is a violation of "The Rules". I kind of agree with "The Rules" on this one. (1/25 sec, f-18, ISO800)
Once again I got Daniel to pose. He is such a trooper, since he has to sit perfectly still for the few seconds it takes to make the shot. Do you understand how hard it is for a 6 year old to sit perfectly still for even half a second? You try it. (1/5 sec, f-18.2, ISO800)
The clouds were coming and going, but the light was still really strong. (1/5 sec, f-18, ISO100)
I really like this shot because the colors turned out good and the slab of rock that I was sitting on leads your eye right up to the waterfall. I also like the glow of the green trees reflected on the rock. (1/2 sec, f-18, ISO100)
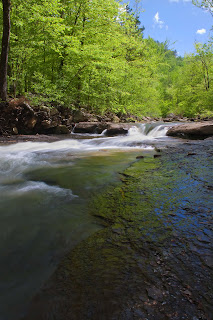
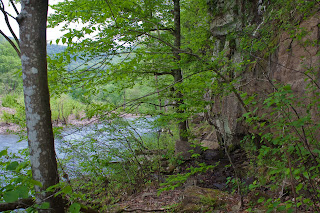
This is looking downstream. Just another beautiful Ozark stream. (1/50 sec, f-5, ISO100)
This is from the top of the waterfall looking upstream. I wanted to capture the essence of the rock garden that this stream is, but I think it shows up too small. (1/30 sec, f-5.6, ISO100)
After we left the creek, we crossed the road and went up the trail. This area is a well known rock climbing area. As we were walking along the bluff line, we came upon this rock formation. I was fascinated by the "selective erosion" that was going on. (My brother the geologist could probably give you a fancier term for that if you want.) I converted this one to black and white to emphasize the shapes and lines. (1/25 sec, f-3.5, ISO640)
As we came over the top of the trail along the bluff, an amazing sight opens up in front of us. (1/30 sec, f-3.5, ISO200)
A little further down the trail and we can see the waterfall being guarded by these house size boulders. (1/15 sec, f-4, ISO800)
I like the way the stream cuts an awkward slot out of the bluff. (8 sec, f-20, ISO100)
I did a little cropping here to take out some distracting elements. (8 sec, f-20, ISO100)
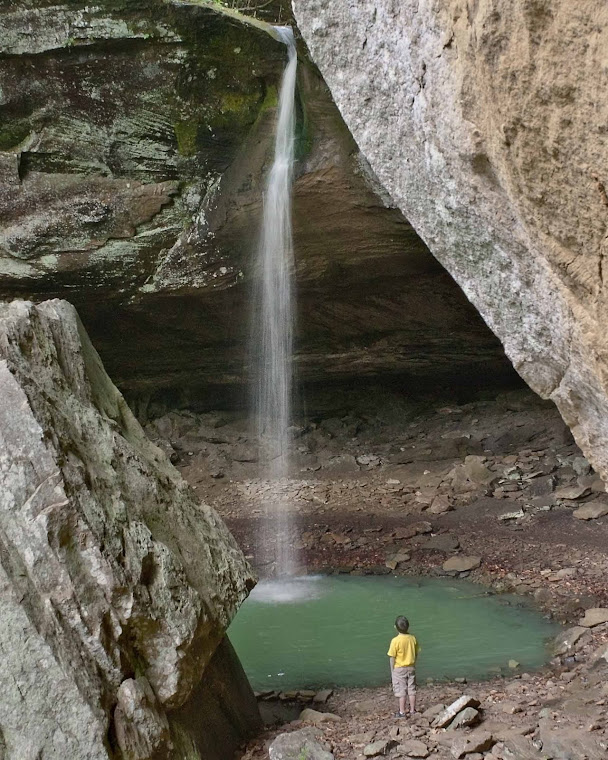
Daniel was in awe. He really did stay still, staring at the waterfall, this time. (1/6 sec, f-9, ISO800)
Another bit of judicious cropping. I think this version is stronger because it emphasizes the vertical lines of the waterfall and Daniel and the slanted lines of the rocks. (1/6 sec, f-9, ISO800)
As we were taking the last few pictures, a light rain was falling, but by the time we got back to the back of the grotto, the sun was back out in full force. Boo. However, not one to waste a chance to take another picture (thanks, Dad), I set up and took this one. I really like the glow from the trees that I got here. (0.6 sec, f-14, ISO100)
We moved on around to the side. I had to photoshop my camera bag out of the picture. Another lesson learned: don't leave stuff in the open when you are moving around. (6 sec, f-18, ISO100)
This gives you an idea of how big those boulders are. Remember Daniel standing by the small one? (4 sec, f-18, ISO100)
Another view but with more of the bluff and overhang that these boulders fell from. (1.6 sec, f-18, ISO100)
As I was looking around, I saw an opportunity to shoot the baby waterfall coming out of the pool. (2.5 sec, f-14, ISO200)
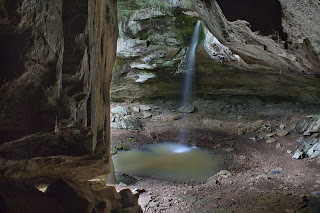
We climbed around behind the house sized boulder to get this shot. (25 sec, f-18, ISO100)
I really dig the composition of this one, I just wish the little tree was in better focus. (1.3 sec, f-20, ISO800)
At this point, I had only been waterfall hunting for a month, so I hadn't seen very much, but it is going to be very hard to top this waterfall. This is an absolutely gorgeous and amazing place. We were here for a couple of hours, and would have stayed all day, but we had other places to go. Good thing, too, because we saw about 20 people coming up the trail on our way back to the truck.
Friday, June 25, 2010
Friday, June 18, 2010
4-17 Pack Rat Falls
Daniel and I left Jessica and Grant in the car and made the short hike up the watershed at the back of the campground to Pack Rat Falls. It was about 5:45 and the sun was going down behind us..
Climbing up on the left side of the falls gave us a good perspective. The color of the pool is exquisite. (15 sec, f-13, ISO100)
Foreground interest and leading lines are a couple of the techniques I used here. I probably should have used a tighter aperture to get better focus in the foreground, but this one works. Even at this time of the day the sky through the trees was blown out. I used the burn tool in Photoshop a lot here. (5 sec, f-8, ISO100)
We climbed up on the right side as far as we could. I liked this overhang and the perspective you get of the falls.(6 sec, f-16, ISO100)
This is a composite of four different pictures that I stitched together in Photoshop. The only problem is you can see a break in the waterfall where the seam between pictures is. Both of the above pictures were taken at the same zoom. (1 sec, f-14, ISO100)
I used Photoshop a lot in these pictures. I used a technique I read on Digital Photography School http://digital-photography-school.com/hdr-style-results-using-layers-in-photoshop that simulates an HDR process. I also used Photoshop's built in HDR method called Photomerge. I shot bracketed exposures, then had Photoshop blend them for me. The key to using techniques like this is to make your pictures look like they came right out of the camera the way you see them on the screen. If you look closely at these pictures, you can see that I haven't achieved that yet.
Daniel and I got back to the car to find Jessica and Grant patiently waiting for us. ;)
4-17 Haw Creek Falls
After we left Long Pool Falls, we went west to Hwy 123 then turned north. Haw Creek campground is a nice little spot right on Haw Creek (go figure). The waterfall is about 30 yards from the parking spot, so is a great spot to take kids. None of the death defying hiking we were doing at Long Pool. Next time we go, we will plan on swimming.
An interesting view of the ledge. It was late afternoon, so the light was ok, but not great.(1 sec, f-18, ISO100)
The same view of the ledge, but this time, I wanted to eliminate the reflection of the sky, which is a little distracting. (0.6 sec, f-18, ISO100)
A standard picture of this waterfall. I kept the sky out of the picture to get a better exposure. (1/2 sec, f-22, ISO100)
This time, I used a framing technique to make a more interesting shot. The sky is a little blown out. (1/2 sec, f-22, ISO100)
I can't wait to visit this waterfall again when the water is running high. In the same campground is another waterfall called Pack Rat Falls that we went to next.
Monday, June 14, 2010
4-17 Long Pool Falls
This was definitely a family adventure. I packed the wife and kids in the mini-van and took off to Russellville. We were on our way to Long Pool Falls, which is supposed to be kid friendly. We got to the campground at Longpool and parked. We saw the water tank and headed down the trail. As the trail dropped off, it got steeper and slicker. Daniel was carrying the tripod, I was carrying the camera bag and Jessica was carrying Grant. I turned around to see this scene and had to take a picture!
What you can't see in this picture is the bluff we were on. Like I said, it was definitely an adventure! (1/25 sec, f-4, ISO400)
It turns out we were on the wrong trail. (1/20 sec, f-5.6, ISO200)
This is the Big Piney Creek, and the trail disappears into the water. (1/20 sec, f-10, ISO200)
So, what do we do? In true Gillson manner, we take a family picture! The kids were having a blast! I can't tell if Jessica's smile is forced, though. (1/40 sec, f-4.5, ISO200)
Along the way take time to take pictures of the flowers. Errr, gumballs. (1/10 sec, f-5.6, ISO800)
Grant is fascinated with the spring water running through the moss. (1/30 sec, f-4, ISO800)
All in all it was a pretty, if treacherous, side hike. What do we do when we get back to the top? That's right: another family picture! (1/40 sec, f-4.5, ISO200)
At this point, we bushwhacked (in true Tim Ernst fashion) up the hill and found the right trail. It was a quick half-mile hike to the waterfall.
There wasn't much water and we had other places to go so I only took a few pictures of the falls. This was the one I liked best because of the way the water falls behind the rocks in the foreground. (6 sec, f-20, ISO200)
After this, we headed to Haw Creek Falls.
Monday, June 7, 2010
4-11 Garvan Gardens in Hot Springs
This week, I took the whole family to Garvan Gardens in Hot Springs. This is a neat little place on a peninsula in Lake Hamilton. There is a man-made waterfall that is easy to move around, so I figured that would be a good place to practice.
Using the "rule of thirds" I placed the waterfall in the right third of the scene. I also put the top of the waterfall on the top third line, but I cropped it down some. My camera has grid lines on the live view screen that I set up in thirds. That helps me to frame each shot.(1/2 sec, f-22, ISO100)
Using the "rule of thirds" I placed the waterfall in the right third of the scene. I also put the top of the waterfall on the top third line, but I cropped it down some. My camera has grid lines on the live view screen that I set up in thirds. That helps me to frame each shot.(1/2 sec, f-22, ISO100)
I framed this one in much the same way as the last one. This time I am looking towards the sun, which causes much higher contrast.(0.8 sec, f-22, ISO100)
Looking towards the sun again. Most of the experts will tell you not to shoot towards the sun. I remembered reading something Tim Ernst wrote about not being afraid to do that, so I did. (0.8 sec, f-22, ISO100)
Looking towards the sun again. Most of the experts will tell you not to shoot towards the sun. I remembered reading something Tim Ernst wrote about not being afraid to do that, so I did. (0.8 sec, f-22, ISO100)
Just a different framing of the previous shot. (1 sec, f-22, ISO100)
One of the composition rules is to include foreground elements, which is what I was aiming for here. (8 sec, f-22, ISO100)
One of the composition rules is to include foreground elements, which is what I was aiming for here. (8 sec, f-22, ISO100)
I converted this one to black and white. I am not sure if it works well, though. (8 sec, f-22, ISO100)
Mostly I was playing with the exposure settings. I was shooting in aperture dependent mode and varying the exposure time. I only had a circular polarizer in these pictures.
The flowers were mostly already past their peak, so I didn't spend much time shooting them. Garvan Woodland Gardens is a beautiful botanical garden right on Lake Hamilton in Hot Springs. Go here to see their website: Garvan Gardens
At Christmas time they have an awesome Christmas light display, and I highly recommend going to see it.
Sunday, June 6, 2010
A Little Bit About My Gear
My awesome wife gave me a digital SLR camera for my birthday a couple of years ago. Little did she know how it would transform me. :)
What I got was a Canon EOS Rebel XS


With an EF 75-300 1:4-5.6 III


And an Canon EF-S 18-55mm f/3.5-5.6 IS


So, of course I had to go out and get a camera bag: Canon Digital Rebel Kit with Case, 58mm UV Filter and LP-E5 Li-ion Battery for Canon XS


Soon I realized I would need a tripod: Dynex 53" Lightweight Digital Camera Tripod


I also added a UV Filter
That got me through the first year. The next Christmas, I got a flash Promaster 7200EDF
and a Canon EF 50mm f/1.8 II Lens
With my old Minolta film SLR, which I got at a pawn shop for a heck of a price, had a Cokin Series A
When I got started doing waterfall photography, I found out that having a circular polarizer
What I got was a Canon EOS Rebel XS

With an EF 75-300 1:4-5.6 III

And an Canon EF-S 18-55mm f/3.5-5.6 IS

So, of course I had to go out and get a camera bag: Canon Digital Rebel Kit with Case, 58mm UV Filter and LP-E5 Li-ion Battery for Canon XS

Soon I realized I would need a tripod: Dynex 53" Lightweight Digital Camera Tripod

I also added a UV Filter

 to protect my lenses (would you rather pay $12 for a new filter or several hundred for a new lens?)
That got me through the first year. The next Christmas, I got a flash Promaster 7200EDF


and a Canon EF 50mm f/1.8 II Lens 

 The f/1.8 aperture enables me to shoot in much lower light without using the flash.
With my old Minolta film SLR, which I got at a pawn shop for a heck of a price, had a Cokin Series A

 filter system with it. That camera had been sitting in the closet for a long time, so I pulled it out and looked through the filters. I discovered, much to my joy, that all I had to do was get an adapter ring that fit my new lenses and I could use all my old filters again! I now have a bunch of filters for shooting portraits, and some other creative types of photography.
When I got started doing waterfall photography, I found out that having a circular polarizer was a must, so I purchased one for each lens' thread size. I also purchased a neutral density filter
 and a graduated neutral density filter
 that would fit my Cokin Series A filter system.
That is what I have had in my camera bag since my second waterfall trip.
Subscribe to:
Posts (Atom)
